Custom-range positions let you concentrate liquidity within specific price ranges. This increases capital efficiency and potential yields—but requires more active management.Documentation Index
Fetch the complete documentation index at: https://docs.orca.so/llms.txt
Use this file to discover all available pages before exploring further.
Pros
- Higher capital efficiency
- Greater fee earnings potential
- More control over your position
Cons
- Can go out of range (stop earning)
- Higher impermanent loss risk
- Requires active monitoring
How to Create a Custom-Range Position
Navigate to the Pools page
Go to orca.so/pools
Connect your wallet
Click Connect Wallet and ensure both the UI and your wallet are set to the Solana network.
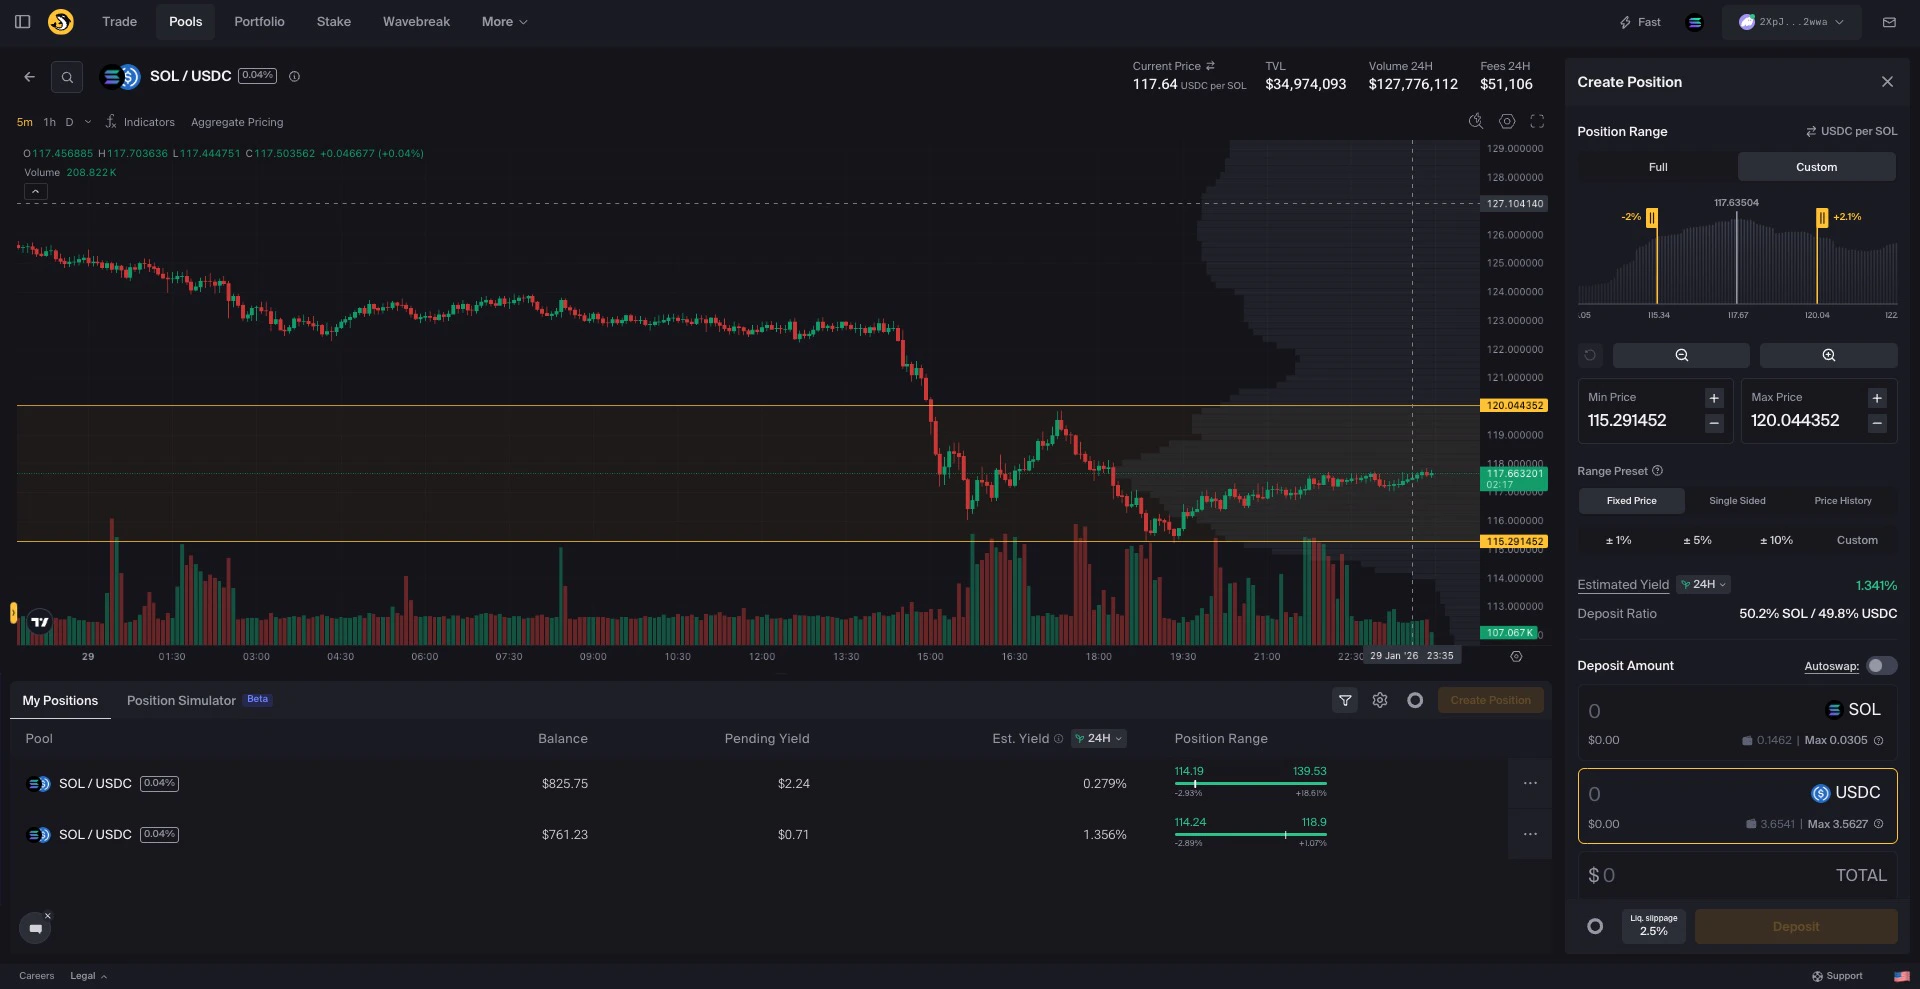
Set your price range
Define your range using any of these methods: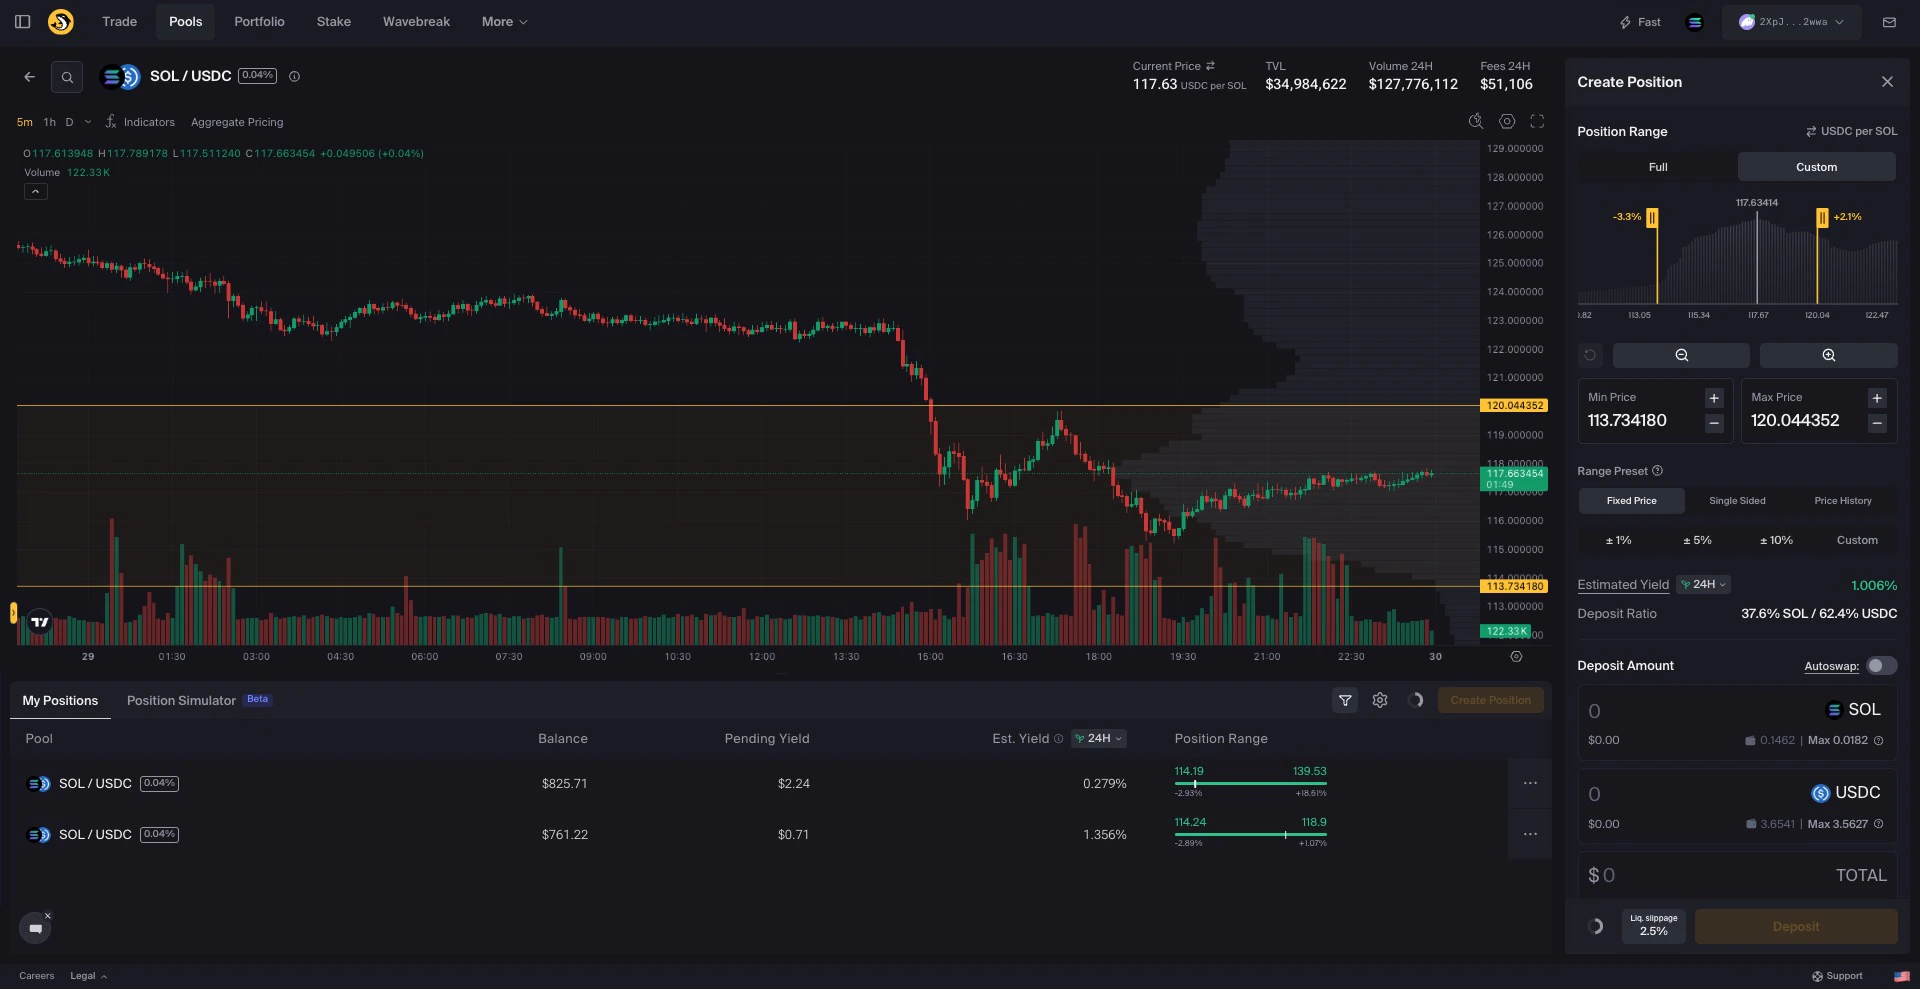
- Drag the sliders in the sidebar
- Drag range boundaries on the price chart
- Select a preset (±5%, ±10%, etc.)
- Type a custom percentage range
- Enter specific prices in the lower/upper fields
- Use +/- buttons for fine adjustments
Enter deposit amounts
Enter your deposit amount in one of the token fields.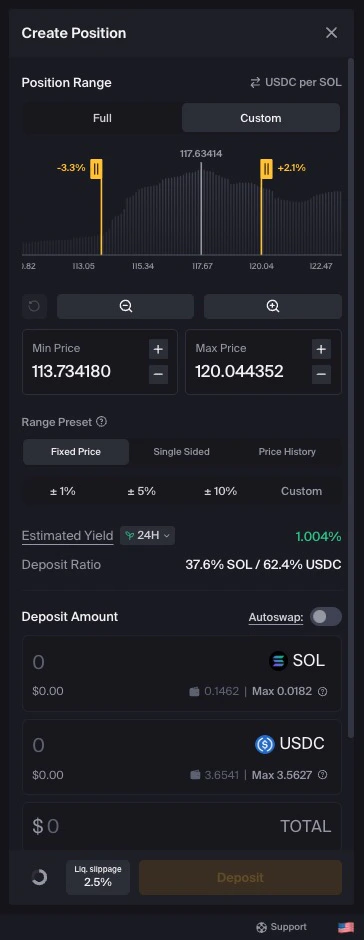
If current price is outside your range, you’ll only deposit one token (single-sided position).
- Type a specific amount
- Click Max to use your full balance
- Use Autoswap to balance your tokens
(Optional) Adjust liquidity slippage
Click Liq. slippage to adjust tolerance if needed.See Understanding Slippage for details.
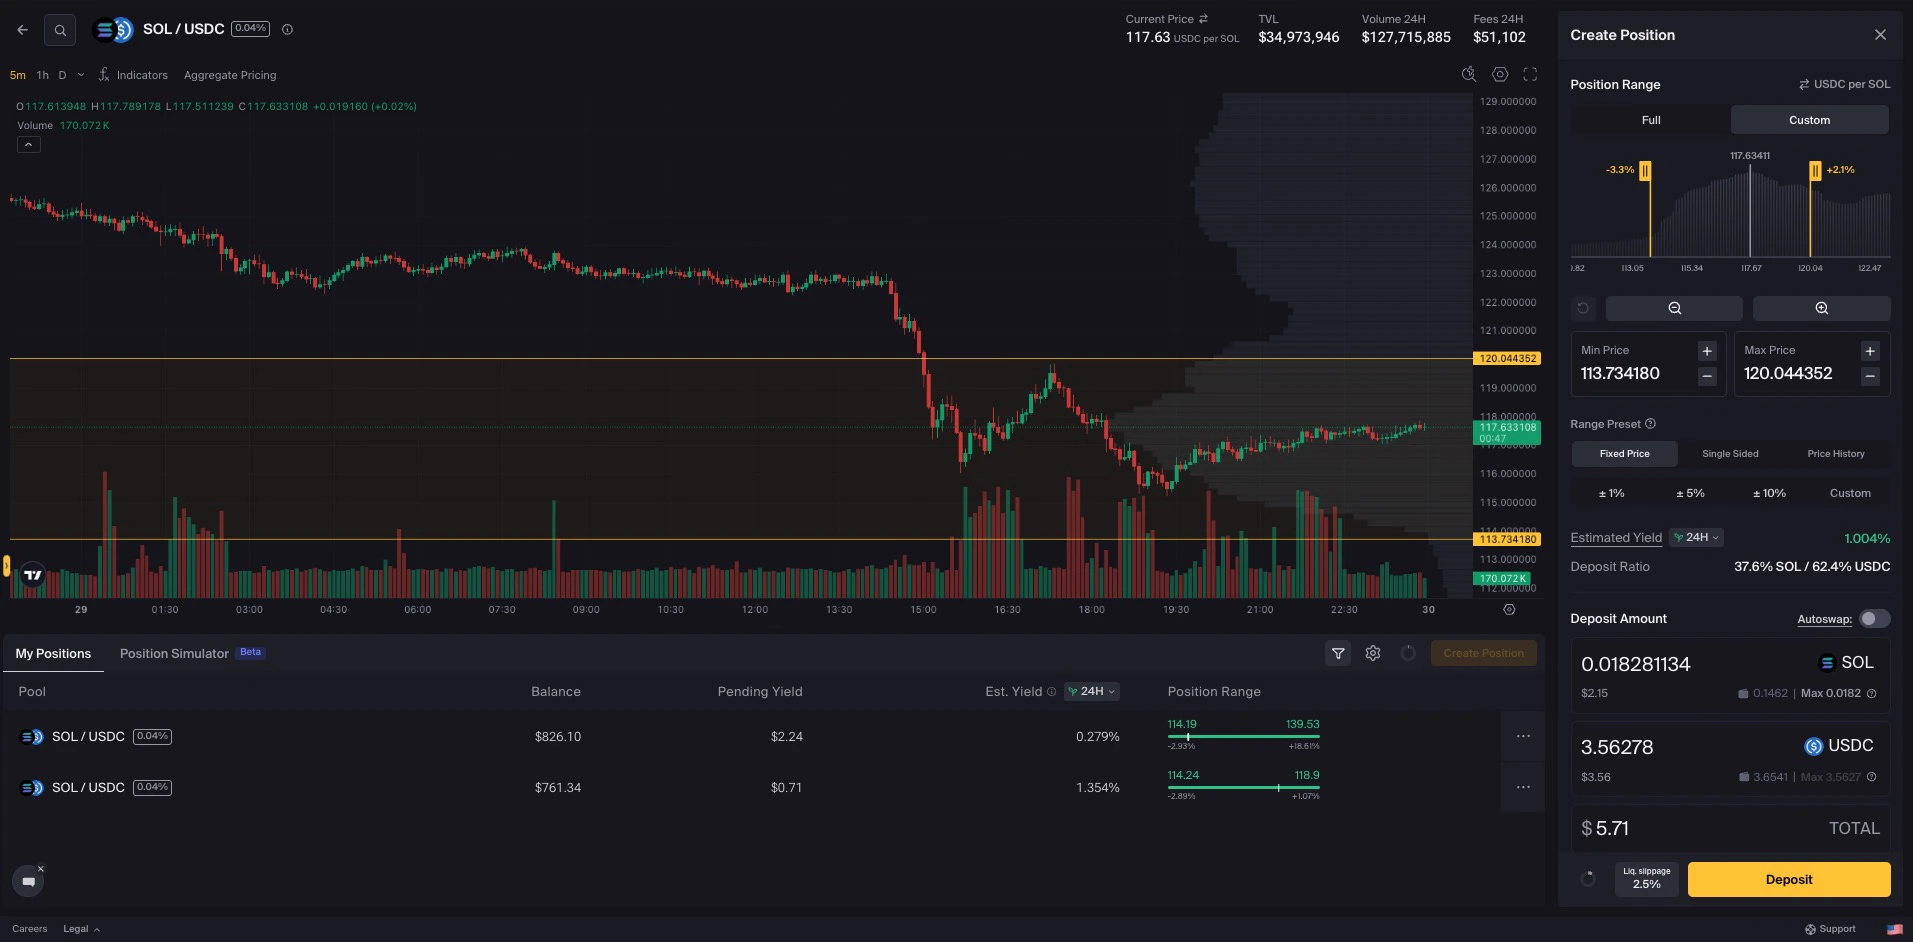
After Creating Your Position
Your wallet now contains a position NFT representing your liquidity. It displays “DO NOT BURN”.
Managing Your Custom-Range Position
Custom-range positions require monitoring:Monitor in-range status
Monitor in-range status
What to do when out of range
What to do when out of range
If price moves outside your range:
- Wait for price to return (if you expect it to)
- Close and reopen with a new range around current price
- Accept it if using as a range order
Rebalancing strategies
Rebalancing strategies
Some LPs regularly close and reopen positions to stay centered on current price. This can maximize fee earnings but incurs transaction costs.
Choosing Your Range
| Strategy | Range Width | Best For |
|---|---|---|
| Tight (±1-5%) | Very narrow | Stablecoin pairs, short-term trades |
| Medium (±10-25%) | Moderate | Active LPs, volatile pairs |
| Wide (±50%+) | Broad | Less monitoring, longer holds |
Next Steps
Manage Portfolio
Monitor and manage your positions
Position Simulator
Visualize potential performance
Position Alerts
Get notified when out of range
LP Strategies
Learn advanced LP techniques